Disclaimer: Creating a table is only available in Excel 2007 and newer.
In Excel, it’s possible to create a dropdown list within a cell. This allows users to choose from a list rather than having to type any information directly into a cell, maybe incorrectly. The simplest way to do this using the Data Validation options is pointing the source of the list to some cells that having the information in them. So, if you want the list to be comprised of departments for your company, you can make the source point to some cells else where that have the departments listed. The downside to this way is that if the list is visible to the user and not protected, they can edit or delete the list, probably by accident, but it can happen. Also, if you want to add new departments to this list, you will have to edit the source of the list to include them.
Setting Up A Simple Data Validation List Without Using A Table
- Create a list of 5 departments in cells E1, E2, E3, E4, and E5
- Select cell A1
- On the Ribbon, select the Data tab
- In the Data Tools group, click on Data Validation
- On the Settings tab, from the Allow dropdown list, select List
- In the Source textbox, type =E1:E5
- Click OK
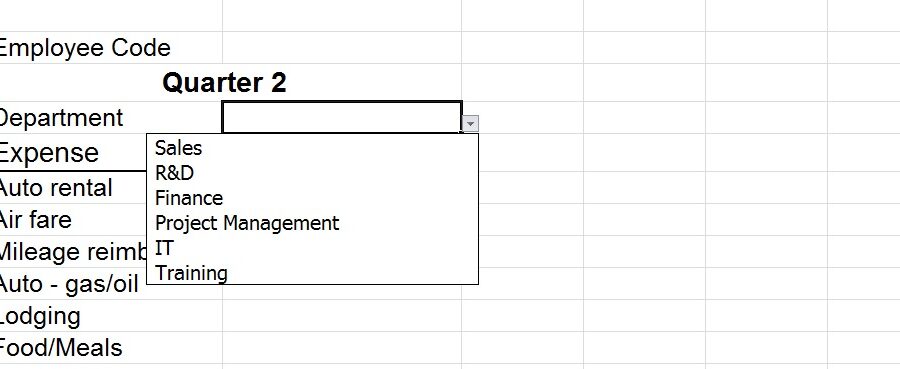
- Verify A1 contains a dropdown list to select Departments
Setting Up A Data Validation List Referencing A Table Column
First, we have to create the table with the departments in it. We will do this on a separate worksheet.
- Create a new worksheet by clicking on the Insert Worksheet button to the right of the very last worksheet tab at the bottom of the screen. (Shortcut Shift+F11)
- Rename this worksheet Administration by right clicking on the worksheet tab and selecting Rename
- In cell A1 of the new worksheet, type Name
- Type the rest of the departments below in cells A2, A3, A4, A5, and A6
- Select cell A1
- To convert this range to a table, we need to select the Insert tab on the Ribbon
- In the Table group, click on the Table button
- Double check to make sure the range =$A$1:$A$6 is in the textbox
- Check the My Table Has Headers checkbox
- Click OK
Next, we need to change the name of this table to something more descriptive.
- Click somewhere within the table you just created
- On the Ribbon, select the Table Tools Design tab
- In the Properties group, click inside the text box that has the default table name, usually Table1, or something similar.
- Type Departments in the textbox, replacing the default name
- Press Enter on the keyboard
Now that the table is setup with a descriptive name, you can reference the table using this name. You can also take it a step further and reference a specific column inside the table. The benefit of something like this, is that when you add new rows to the table, any formula using the table reference will update to include the new rows automatically.
To reference a specific table column you can use the following method.
TableName[ColumnName]
In our example, you would use the following.
Departments[Name]
Now we need to go back and setup our Data Validation using the table reference.
- Go back to the blank worksheet that we started with before making the Administration worksheet
- Select cell A1
- On the Ribbon, select the Data tab
- In the Data Tools group, click on Data Validation
- On the Settings tab, from the Allow dropdown list, select List
- In the Source textbox, type =INDIRECT(“Departments[Name]”)
- Click OK
- Verify A1 contains a dropdown list to select Departments
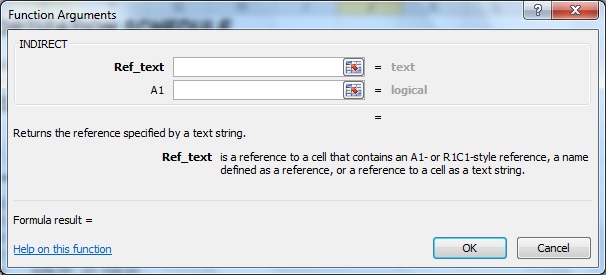
Microsoft doesn’t allow direct reference to a table and its columns from the Data Validation. Because of this, we have to include the INDIRECT function as well. The image below shows you the arguments dialog box which gives a brief description of the function.

Now that this is setup, you can add new rows to the Departments table, and they will automatically show up in the Data Validation dropdown list.


Tremendously useful and clearly explained. Much appreciated!
Glad it could be of use to you!
I’m losing my mind.. I’m trying to make a list from a series of tables. I am doing this in order to be able to auto populate once I choose the table name from a list. Is this possible?
Hey! Can’t say that I have attempted that before but never say never. Is the list you are making with the table names in it a data validation list that when a table name is selected will auto-populate a separate list with values from the table selected?
What if Table has departments duplicated, and you want the Data Validation function to removed duplicates from the drop down?
And on top of that, for the next Data validation, I need drop down to show the information from the following column from the table, based on the previously selected department. Thanks.
Brandon,
Great information – it works perfectly and if the table is in the same workbook!
How do I refer to a table from another excel file (in the same Windows folder) ? I tried the following syntax, but got an error:
=indirect(“[A_Diffent_Workbook.xlsx]Some_Table[Some_column]”)
Where:
A_Diffent_Workbook.xlsx is a remote file
Some_Table – Name of the Excel table I am referencing in “A_Diffent_Workbook.xlsx”
Some_column – Name of the column in the table “Some_Table”
Thank you very much.
I answered my own question with regards to referencing a remote Excel table for creating a value list!
I simply removed the square brackets around the remote workbook name and added a “!” between the workbook name and the table name. The following works for me:
=indirect(“A_Diffent_Workbook.xlsx!Some_Table[Some_column]”)
Hope this will help someone.
Sorry for the delay in response. Missed this comment in the notifications. Glad you got it figure out!
Excellent content
That’s the magic of internet, your tip has answered a question I had for a long time, so thanks and have a good day!
You’re very welcome! Glad to help!
Thanks very much for the hint, is simple to use and very very useful
You’re welcome! Glad to help!
Hey Brandon!,
I followed step by step and seem to be having an error occur. I typed =indirect(“Department[Name]”) in the source textbox, however i get a message that pops up “The source currently evaluates to an error. Do you want to continue?” Any suggestions on why this may be? Thanks so much for your time!
Double check the name of the table. Make sure it is named Department and not Departments so that it matches what you are trying to reference there. Or vice versa, change your source to Departments instead of Department. The syntax itself is correct, so the only thing I can think of is that the reference you are trying to use isn’t recognized.
Thanks a ton for this. Do you know if there’s a way I can make multiple Tables the source of a Data Validation? i.e. Source Table 1 contains Active Users, Source Table 2 contains Inactive Users and 1 cell which has data validation with a combined list of Active and Inactive Users.
There’s not a simple way to accomplish this with functions as far as I know (if you do find a way please let me know! lol). If it’s possible for your setup, would you be able to combine them into one table with an extra column that marks each row as ‘Active’ or ‘Inactive’? The single column could then be collected for the validation list and you could use a filter function to grab only the active or inactive from the column for wherever else you want to use it. If not and you are familiar with VBA, in my opinion, coding it would probably be the easier way.
Brandon
Thanks – just what I was looking for. This INDIRECT is a great function. Appreciate the post.
+Steve
You’re very welcome! Glad it helped out!
Thanks Brandon, that was really helpful. I searched for ages through Excel help to see if it were possible to refer to a table for data validation but found nothing. A quick check in Google and I found your site which answred my query perfectly.
Thanks again, Brian
Not a problem! Glad to have helped!
What if I wanted to feed the data validation list from a dynamic table source? That is, if I added a new department in row 14 of this workbook, the data validation list will auto-update. Thank you!
Apologies for the delay! Using the table references as a source for the list will do this automatically. When you use a table’s column reference is grabs everything in that column at that point in time. If something was added or removed, it will reflect that next time it fetches the source, in this case, when the user clicks on the dropdown.